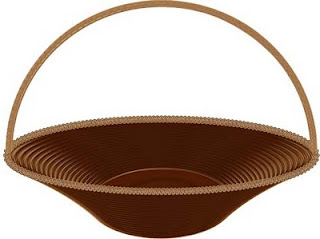
Here's how I did this.
 I started with a small swatch that I made of short lines in various stroke weights and shades of brown/tan. I turned this into a pattern brush.
Once I had the pattern brush, I used the circle tool to create an oval that matches the lip of the basket. I applied the brush to the oval and tweaked the stroke some more until I was happy with the look.
The rest of the bowl was really simple: I used the Transform tool and started with an arbitrary 29 repetitions. I then tweaked the horizontal scale control down into the minus category (the Preview feature is really handy here). Then I tweaked the Move Vertical a bit into the minus category, watching the preview until I stopped seeing white space between the rings. Expand the Object, and that was all there is to the bowl of the basket. I added some extra body to the basket by copying the bowl layer, pasting it over the top of the original and shifting it horizontally and vertically several keyboard clicks. This worked to fill in the occasional blank space between coils.
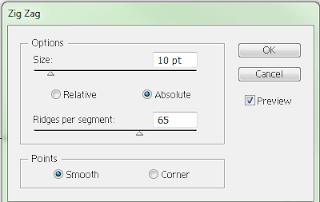
The lip of the bowl was created from a fresh circle that I visually matched up with the top ring. Once again, I applied the pattern brush to that. To get that the cool windings, I used the Zig-Zag tool in the Distort and Transform tool set. You can see the dialog box for that below:

Like always, I turned Preview on, so I can see what I'm rendering. By setting Points to Smooth, I got a coiling effect instead of the basic zig-zag. Then I just pumped up the Ridges per segment slider until I got some tight coils. Voila!
Finally, the handle is the top half of a circle arc with the same wood brush applied. After thickening it up a little, I put another circle arc over that and applied the actual zig-zag transform to that.
Now I'm ready to put some Easter eggs in this basket!
No comments:
Post a Comment